Search the Omeda Knowledge Base
Facebook Events Manager – Integration Overview and Setup
Overview
Facebook Events Manager is a tool within Facebook Business Manager that helps companies better advertise to Facebook users that have visited the company’s website(s). This is done through use of the Facebook tracking pixel.
This integration allows Omeda CDP (Olytics) clients to target segments of that website traffic (Via Audience Builder Queries) and sync those targeted visitors to Facebook Events Manager for advertising purposes. In this way, our CDP clients can target specific anonymous and known customers from their website with targeted ads on Facebook.
Setup – Facebook Pixel
The first step to having this integration set up is to ensure the Facebook Pixel is running on the site(s) that you want to connect with. Facebook provides detailed instructions on how to get this up and running here or see below.
Step 1: Log into Facebook Business Manager Account.
Step 2: In top left corner, click Business Manager, then Events Manager.
Step 3: Click on “Connect Data Sources” in green.
Step 4: Once on “Connect Data Sources” screen, select “Web” then click “Get Started”.
Step 5: Then on “Set-Up Web Events” screen, select “Facebook Pixel” and click “Connect”.
Step 6: On “Connect Website Activity Using Facebook Pixel” screen, name your pixel and click “Continue”.
Step 7: Choose to either install code manually or use a partner. Then copy pixel code.
Step 8: Add pixel code to your website between the <head> tags.
Setup – Omeda
Once your pixel has been set up, you can finish the integration. To get started, click the Facebook Events Manager icon from the integrations page.
Step 1 – Add a New Site
Setting up individual sites allows you to connect your various domains into your pixel(s).
To set up a new site, you’ll need to set up a site domain and then save:
As each of the domains is saved, they will appear in a list – along with the count the events you have set up on the site, the username who created the site and an action menu.
Clicking into any one of the sites will bring you to the Facebook Pixel Event list.
Step 2 – Creating new Facebook Pixel Event
Once a domain has been saved, you’ll have the option to create a new event.
Clicking the ‘Create New’ button will pull up the details necessary to connect with the pixel.
Once you save this, the pixel(s) that you have running on a single domain will appear in a list and you’ll be able to see:
- The name of each event
- The associated pixel code
- The status of that event
- Who created the event
- The date and time stamp
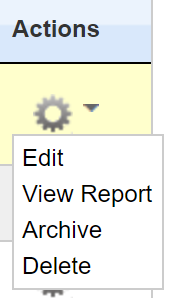
- Actions drop-down
Step 3 – Configure Your Pixel Event
Once the pixel has been set up, you’ll be able to configure it. You can either click the name of the pixel event or select ‘edit’ from the actions dropdown.
Once you’re in edit mode, you’ll have the general tab where the pixel event name and code are stored.
In settings, you’ll be able to set the start and end date/time, along with how the visitor needs to be on the site before they are passed to the pixel.
In URL Targeting, you are able to set up the Urls that the Facebook Pixel will target and/or exclude.
Identical to the metering setup, you can target/exclude Url patterns, specific page(s), Url parameters, and specific entry points.

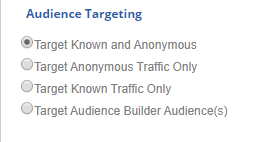
Once the URLs have been set up, you can move on to Audience Targeting.
- Known and Anonymous – This will target all visitors who come to the site and stay for at least the specified duration.
- Anonymous – This will only pass along the anonymous visitors to the site
- Known – This will only pass along all known visitors to the site
- Audience Builder Audience(s) – This allows you to select saved audience segments from your data base
Once you’ve passed through each tab, you can save the changes, archive the event, delete the event, and save and activate the job from the General tab.
Reporting on Pixel Activity
There are two levels of reporting available for the AdRoll Event Based Audiences integration:
- Site level – This will combine the audiences from all of the underlying events
- Event level – This will only report back on the individual Audience Sync
Site Level Reporting
To view the site level reports, select ‘View Report’ from the actions dropdown to the right of the Site
The following reports are available at the site level:
- Site level Visitor Syncs (Last 90 Days)
- Total Anonymous Visitor Syncs Per Event Audience (Last 90 Days)
- Unique Anonymous Visitor Syncs Per Event Audience (Last 90 Days)
- Total Known Visitor Syncs Per Event Audience (Last 90 Days)
- Unique Known Visitor Syncs Per Event Audience (Last 90 Days)
- Top X Referring Sites (Last 90 Days)*
- Site-Level Unique Visitor Syncs Per State (When Location Available)*
- Syncs per Hour*
*Available at both the site and event level
You can export the series of reports using the “Output to PDF” button in the upper left-hand corner of the report itself.

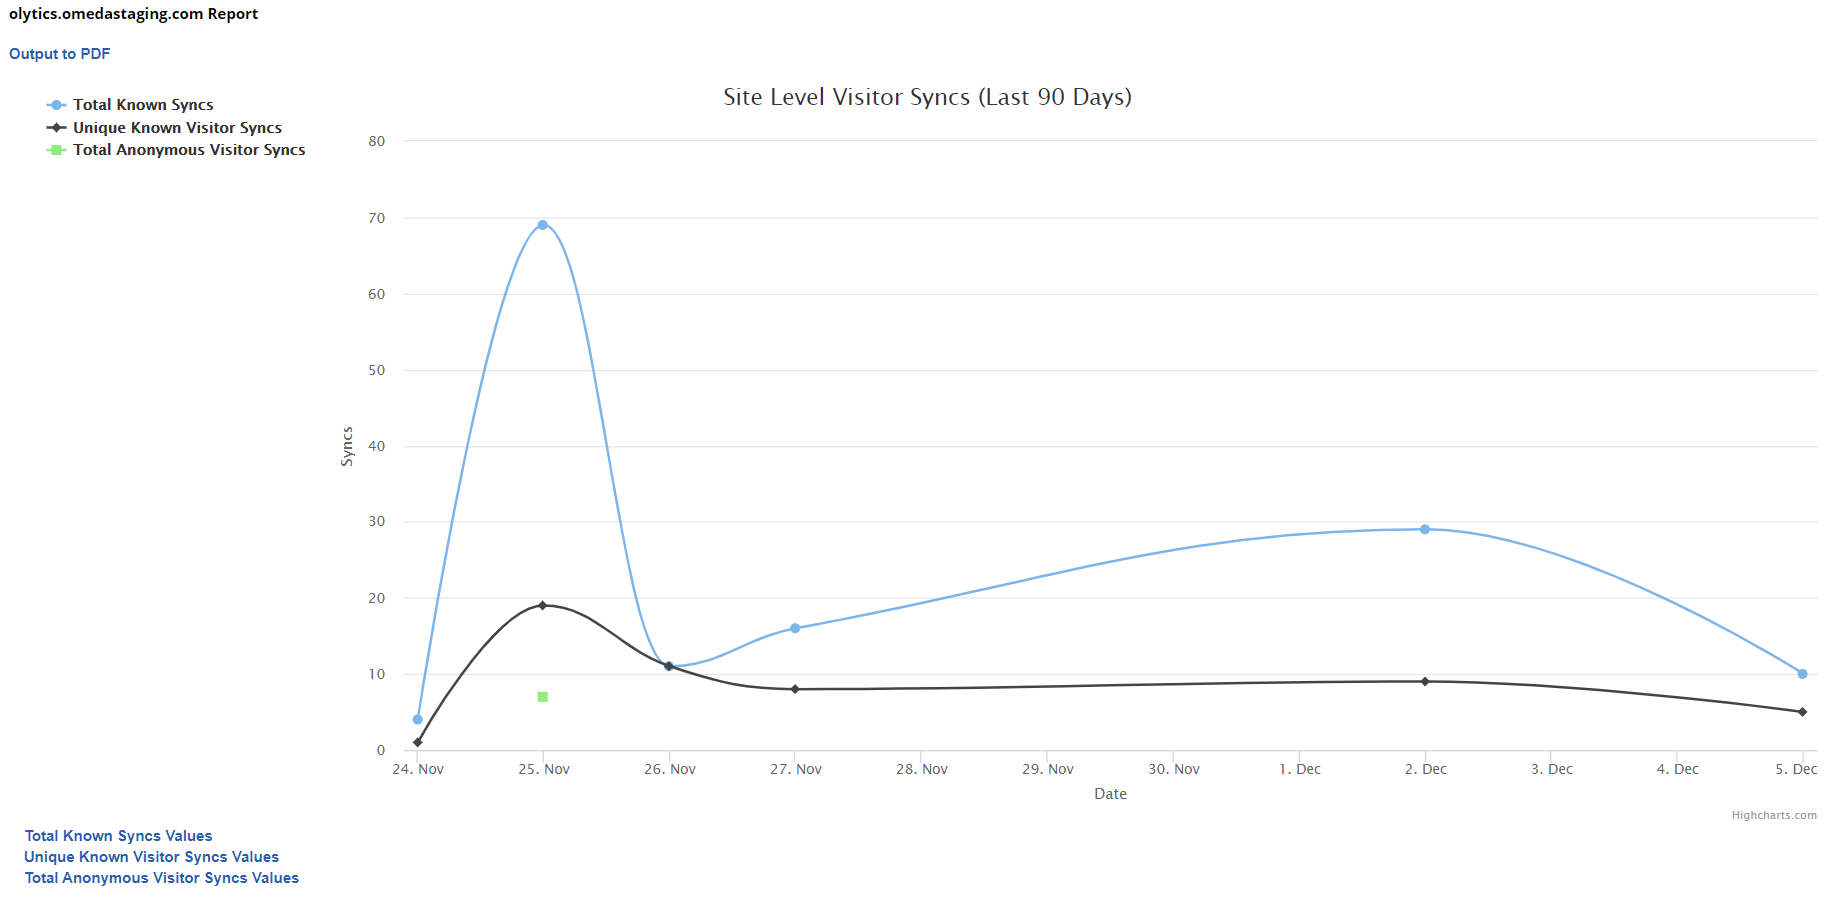
Site Level Visitor Syncs (Last 90 Days)
This report will show all of the website visitors to the site who were synced to the Facebook Pixel regardless of which audience sync they were part of. You’ll have lines for each of the following:
- Total Known Syncs (all known visitors who have visited your site – count is 1 per site visit, per day)
- Unique Known Syncs (all known visitors who have visited your site – count is 1 per person per day, regardless of how many times they visited)
- Total Anonymous Visitor Syncs (all anonymous visitors who have visited your site – count is 1 per site visit, per day)
- Unique Anonymous Visitor Syncs (all anonymous visitors who have visited your site – count is 1 per person per day, regardless of how many times they visited)
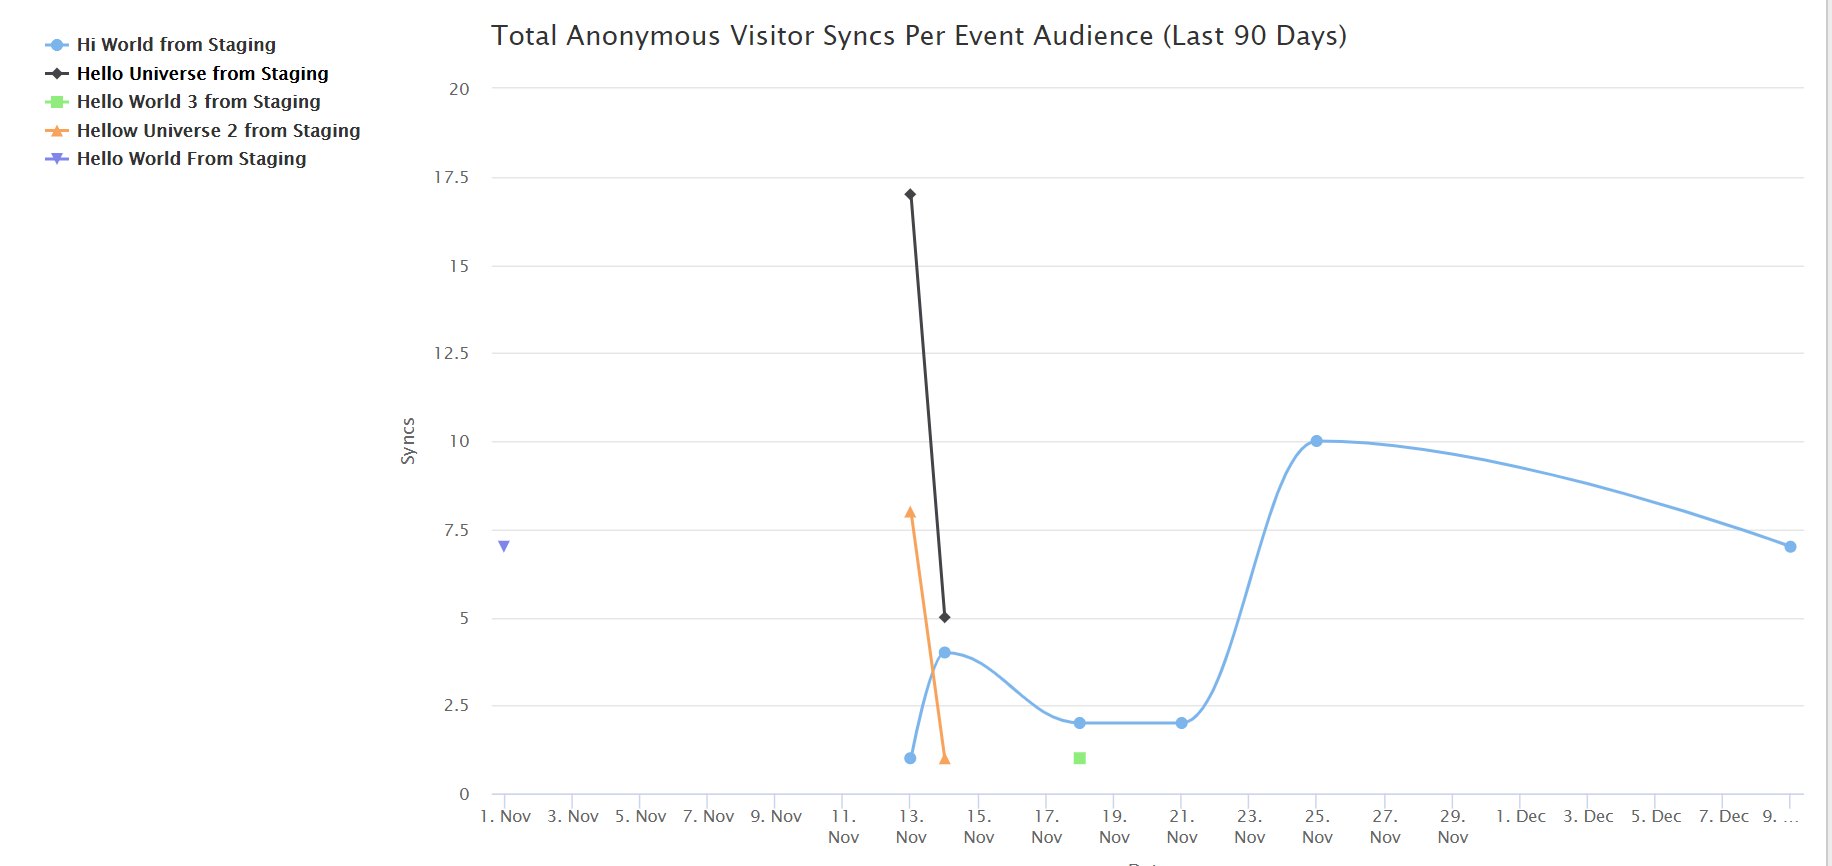
Total Anonymous Visitor Syncs Per Event Audience / Unique Anonymous Visitor Syncs Per Event Audience (Last 90 Days)
These 2 reports look the same. The Total Anonymous report will show the total anonymous visitors who were synced, per day, per event audience. This will count each visit as 1, so if the same person comes back 3 times on a single day, they will be counted 3 times. Alternatively, the Unique version of this report will only show how many people were synced per event audience per day – regardless of how many times they came to the site. In this case, someone who visits the site 3 times in a single day will only be counted as 1.
Total Known Visitor Syncs Per Event Audience / Unique Known Visitor Syncs Per Event Audience (Last 90 Days)
These 2 reports look the same. The Total Known report will show the total known visitors who were synced, per day, per event audience. This will count each visit as 1, so if the same person comes back 3 times on a single day, they will be counted 3 times. Alternatively, the Unique version of this report will only show how many people were synced per event audience per day – regardless of how many times they came to the site. In this case, someone who visits the site 3 times in a single day will only be counted as 1.

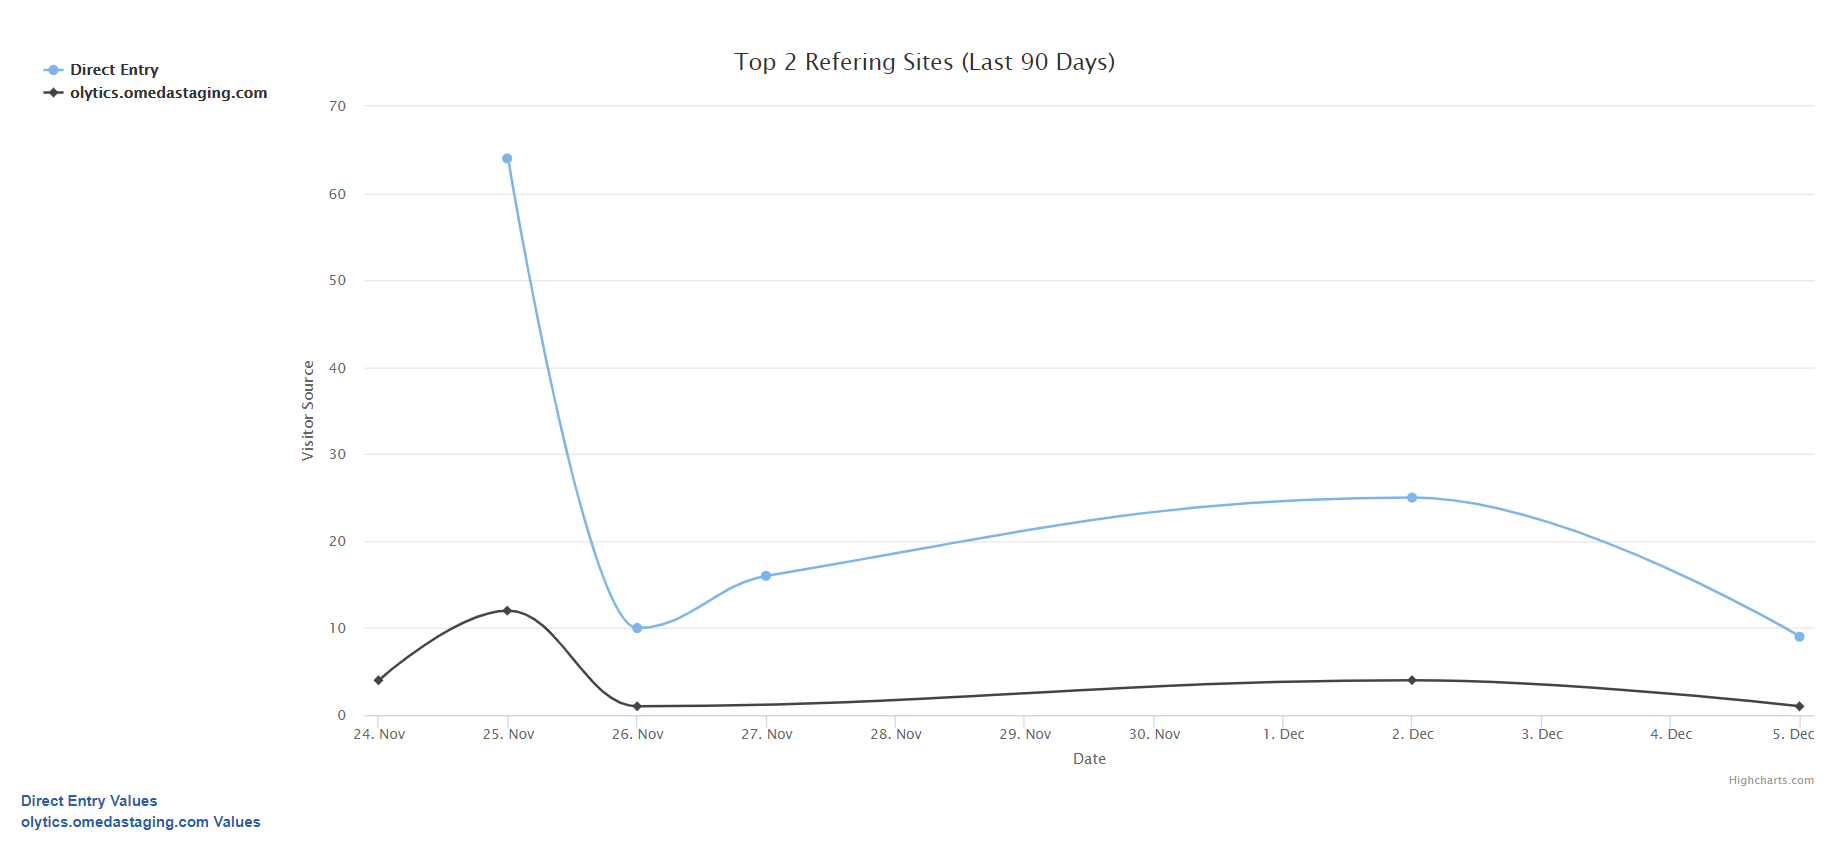
Top X Referring Sites (Last 90 Days)
This will track the sites that brought both anonymous and known visitors to your site and chart it out so you can see where the majority of your syncing activity is coming from. Note: The number of referring sites will change depending on your audience syncs that you have set up.
Unique Visitor Syncs Per State (When Location Available)
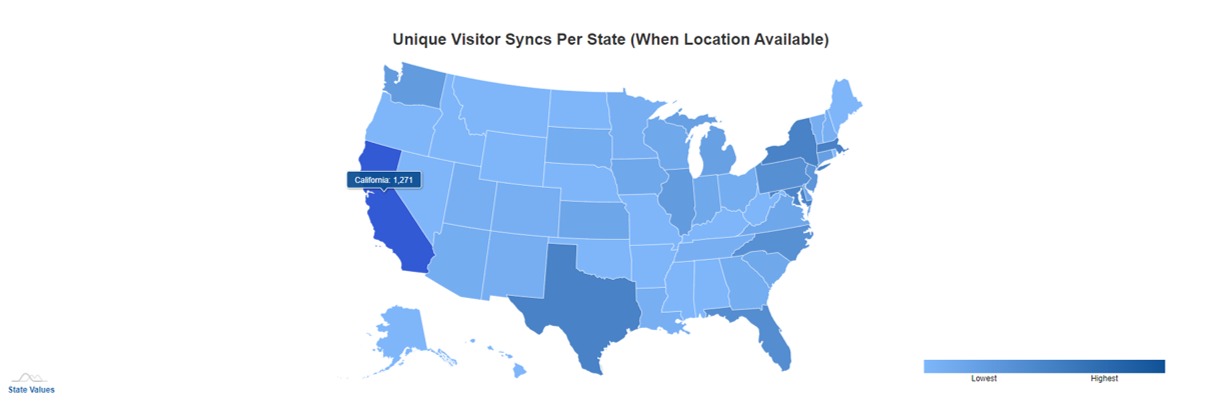
This geographic report provides a heat map of the United States and shows where your visitors are from – hovering over each state will provide the actual count
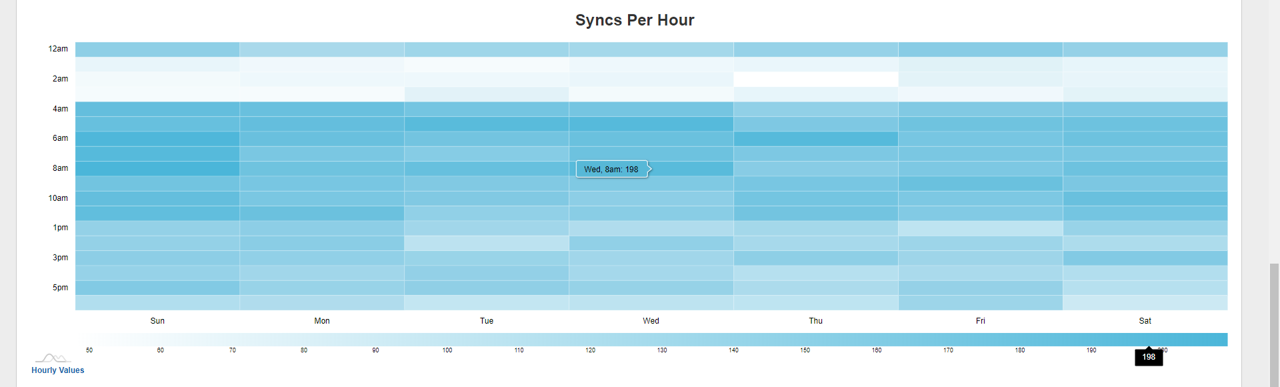
Syncs Per Hour
This unique chart will help you visualize what time(s) of day your pixel had the most traffic, allowing you to launch additional events accordingly.
Event Level Reporting
To view the event level reports for individual Audience Syncs, select ‘View Report’ from the actions dropdown to the right of the Audience Sync:
You can also choose ‘View Report’ from the General Tab when you’re in an AdRoll Audience Sync.
The following reports are available at the individual Audience Sync level:
- Distinct Customer Sync Counts
- Live Syncs (Last 90 Days)
- Top X Referring Sites (Last 90 Days)*
- Site-Level Unique Visitor Syncs Per State (When Location Available)*
- Syncs per Hour*
*Available at both the site and event level
You can export the series of reports using the “Output to PDF” button in the upper left-hand corner of the report itself.
NOTE: The counts returned in the event level reports are based on olytics cookie tracking settings. AdRoll’s identification logic is different than that used by olytics. You should expect audience counts in AdRoll to be lower than the values shown within the Omeda-generated reports.
Distinct Customer Sync Counts
This report will show all of the website visitors that your audience sync has passed to AdRoll. They are organized by the following:
- Known Synced (all known visitors who have synced to this event audience since it was activated)
- Anonymous Visitor Synced (all anonymous visitors who have synced to this event audience since it was activated)
- Total Visitors Synced (the sum of all anonymous and known visitors who have been synced to the event audience since it was activated)

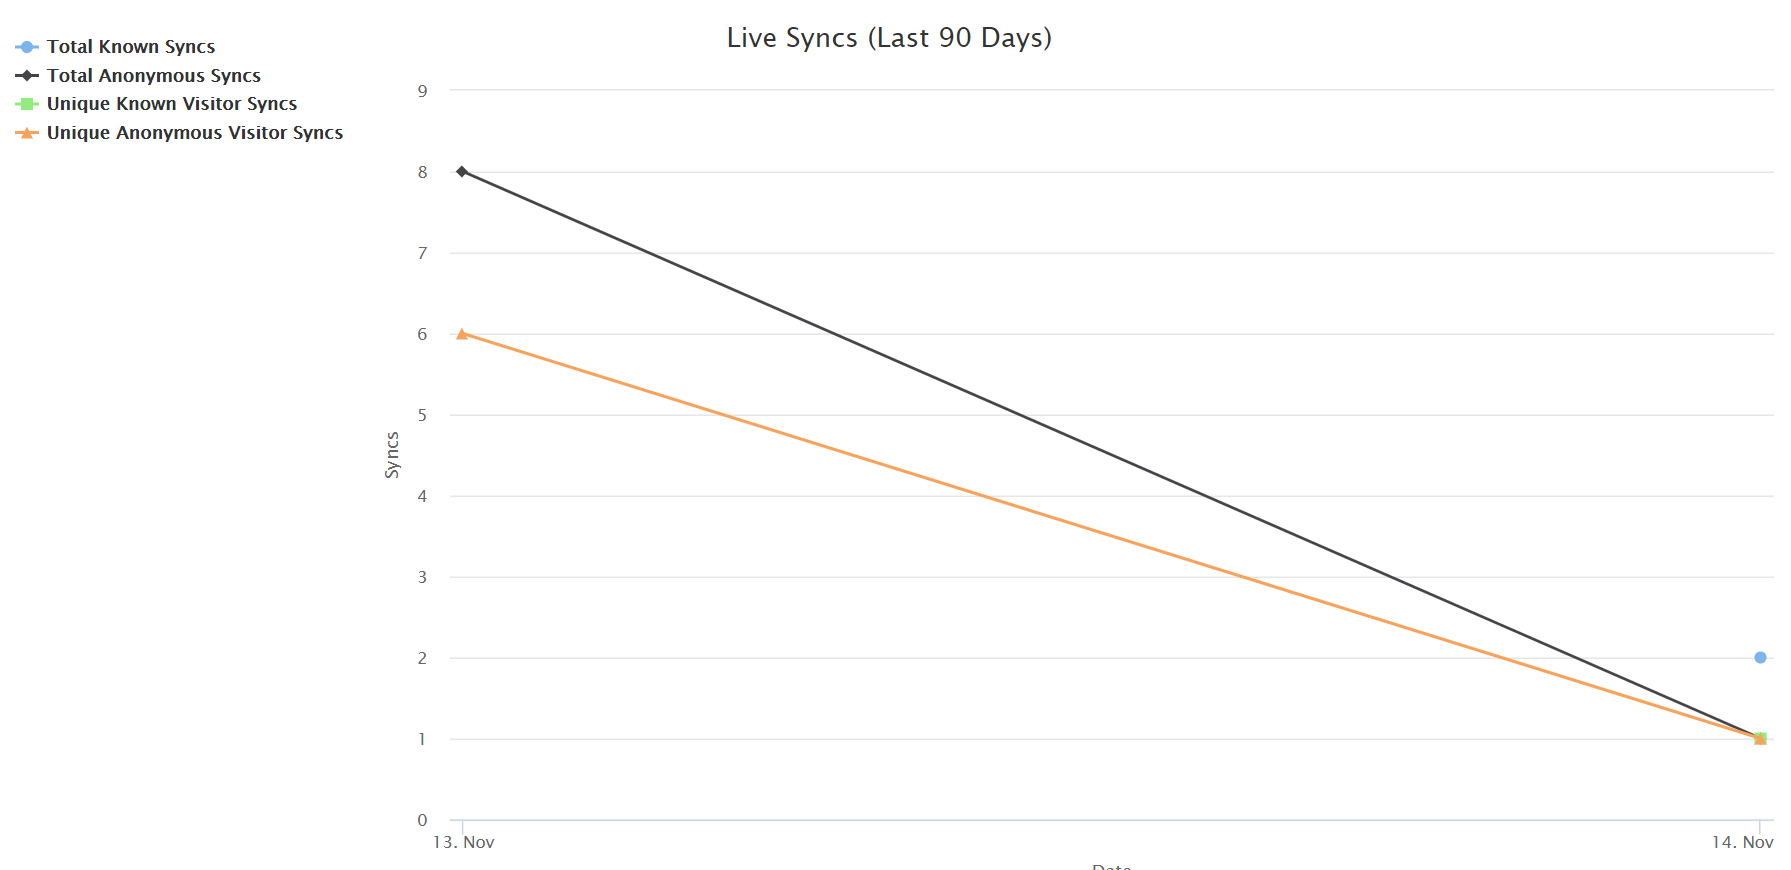
Live Syncs (Last 90 Days)
This report will show all of the visitors who were synced as part of this audience with a daily breakdown. You’ll have lines for each of the following:
- Total Known Syncs (all known visitors who have visited your site – count is 1 per site visit, per day)
- Unique Known Syncs (all known visitors who have visited your site – count is 1 per person per day, regardless of how many times they visited)
- Total Anonymous Visitor Syncs (all anonymous visitors who have visited your site – count is 1 per site visit, per day)
- Unique Anonymous Visitor Syncs (all anonymous visitors who have visited your site – count is 1 per person per day, regardless of how many times they visited)
Top X Referring Sites (Last 90 Days)
This will track the sites that brought the visitors to your site and chart it out so you can see where the majority of your syncing activity is coming from. Note: The number of referring sites will change depending on your audience syncs that you have set up.
Unique Visitor Syncs Per State (When Location Available)
This geographic report provides a heat map of the United States and shows where your visitors are from – hovering over each state will provide the actual count
Syncs Per Hour
This unique chart will help you visualize what time(s) of day your pixel had the most traffic, allowing you to launch additional events accordingly.
Note: Future enhancements to this integration will also allow for additional tracking within Audience Builder.
For more information regarding our CDP solution, for help with strategic planning, or for questions on setup and implementation, contact our client success team at clientsuccess@omeda.com